
Learn everything you need to know about the Advanced Settings section with the Dines Functions menu.
Advanced Settings

The Advanced Settings section within Dines Functions gives you the ability to completely tailor your device to your style of venue, whether you're operating a bar, running a street food stall, or providing table service.
In the guide below, we will walk you through the function of each individual setting, and show you how to create your own customised settings per device, that can be easily imported onto other devices.
To access Advanced Settings, simply tap on the “Functions” option at the top of Dines EPOS, and scroll to roughly halfway down the page.
Article Contents
Disable Check for Paired Reader
Return to First Category on Menu Refresh
Auto-Send Table Service Orders
Service Charge - Customer Choice
Ignore Auto Apply Service Charge
Enable Multiple Head Discounts
Sessions Split Payment Shortcut
Exporting/Importing Custom Settings to Other Devices
Custom Settings Glossary
In the sections below, we will run through every setting that is included in Advanced Settings. If you need to find something in particular, each section is named after its Setting, so you can utilise the CTRL+F shortcut on Windows, CMD+F on a Mac, or the Find function on your smartphone to quickly locate the setting you're looking for.
At the end, you will find a couple of sections dedicated to importing and exporting custom Device Settings.
Card Reader Settings
Choose Device Location
Tapping on this option will allow you to reselect the location in which you are using your device. This is useful if you trade from multiple locations, and you are moving your device from Venue A to Venue B.
This can also come in handy if you are never in need of reconnecting your card reader, as described in Card Reader: Tips & Troubleshooting. After choosing your location, you will be automatically prompted to reconnect your reader.
Auto Reconnect Card Reader
When you activate this setting, your device will automatically reconnect to the last card reader you used, every time you open the Dines App. This will happen as long as the card reader is charged and turned on.
If you wish to connect to another reader, you can deactivate this setting, or you can turn off the previous reader.
Instant Charge
With “Instant Charge,” you can immediately start a card charge when you press “Pay Now” on EPOS. This feature is particularly useful if your venue only accepts card payments, as it eliminates the need for an additional step to select a payment method. Please note, if you wish to add a discount or a tab, you will need to cancel the card payment.

Disable Check for Paired Reader
With this feature active, the device will stop checking if there is a card reader paired to it whenever you access the EPOS tab.
Customise Menu
Current Selection
If you are trading with multiple menus (e.g. a bar menu and a restaurant menu), and making use of Device-Specific Menus on Dines, this will display the menu currently loaded on your EPOS.
Assign a Specific Menu

As above, if you are using Device-Specific Menus on Dines, this will allow you to assign a menu to your device. Once activated, a list of your available menus will be displayed. To activate a menu, simply tap on it, and it will be displayed on your EPOS.
Override Default Menu
If this device has been assigned specific menus via the Inventory (where you add, edit and categorise items), you can use this function to override and disregard this selection. This will instead display the full default menu in its entirety.
Images Enabled
This setting specifies whether you wish to include images alongside your menu items on EPOS.
In order to display images, you will need to assign an image to each item via the Inventory screen, which can be found on the left-hand side of the Dines web app, or by navigating to Admin > Manage Inventory on iOS.
Editing any item on here will open up a page where you can modify the item. This includes the option to incorporate an image by either dragging and dropping, or uploading via the "Image" box.

A menu with images can look like the below;

Whereas a menu without images can look like the below;

As standard, if you have not assigned images to your items, Dines will show generic clipart; cutlery for “Food” items, a mug for “Drink” items, and a t-shirt for “Other” items.

Rows and columns will appear differently from device to device, but on a standard iPad, you will see 15 items per screen with this setting enabled, as opposed to 20 without.
Scroll Direction
Choose the direction that you wish to scroll through menu items! By tapping the arrows on the right-hand side, you can choose whether you wish to scroll vertically or horizontally on EPOS.
By default, scrolling is horizontal on iPads, and vertical on iPhones. Please note this also changes the order items appear. See below examples;
Horizontal Scroll

Vertical Scroll

Close Search Automatically
This option will dictate whether the EPOS Search function automatically closes once you've found and actioned your desired item, or if it remains open for further searches.
The below is an example of Close Search Automatically being enabled.

If disabled, the Search box will simply stay open. You will need to manually close the Search box by pulling down, or by tapping the back arrow at the top left.
Return to First Category on a Menu Refresh

This feature allows you to customise the behaviour of the Refresh button in EPOS mode. The Refresh option, in general, updates your menu to the latest version. It applies any adjustments you've made via Inventory, such as price changes or additional items. Your menu will also update every time you take a payment or send an order.
When enabling this setting, Refresh will send you back to the first category on your menu. If disabled, you will remain on your current category.
It will also return your menu to the first category once you have processed an order.
To enable or disable this option, just head to Functions > Customise Menu > Return to First Category on a Menu Refresh.
Screen Time Out
Screen Time Out determines whether your iOS device's screen remains active or automatically turns off in accordance with your device settings while using Dines.
When the setting is enabled, your device will go to sleep based on your device’s sleep settings, which is generally under a minute on most Apple devices by default. When disabled, the screen will remain active as long as you have Dines open.
By default, this setting will be disabled.
Checkout Settings
Quick Service Mode
With this feature enabled Pay Now orders are automatically Ordered Away, meaning they will go to the “Past Orders” tab directly without going through the “Live Orders” tab. This helps to streamline your service, ultimately resulting in less taps to serve your customers.
Having Quick Service Mode disabled will mean you must manually order away customer’s orders from the Live Orders screen.
You can enable or disable this setting by going to Functions > Checkout Settings > Quick Service Mode.

Auto-Send Table Service Orders
Auto-Send Table Service Orders gives you the option to to automatically send your Session Orders either to "Order Away" or "Live Orders," meaning that you don’t need to make this selection for each individual order.
"Order Away" means that the system will automatically mark the order as "Served," indicating that it is complete and will show up in past orders. On the other hand, "Live Orders" means that the order will be designated as "Being Prepared.” The latter will require updating via the Live Orders tab. To do so, head to the Live Orders tab (at the bottom left of your EPOS screen), and simply tap on the relevant order to get the option to Order Away.

To enable or disable Auto Send Session Order, head to Functions > Checkout Settings > Auto-send Table Service Orders. Here, you will see a drop-down, allowing you to Disable the feature, set all Session Orders as “Order Away,” or set all Session Orders as “Live Orders.”
Note Required on Order
If you enable this setting, it will become mandatory for every order to be accompanied with a note. This is ideal for capturing a customer’s name, special requests that they may have, or anything else that can contribute to improving their overall experience.

It is also possible to set Default Shortcut Notes, for example, “Bring All Food At The Same Time,” or any common requests that your venue receives frequently. This saves time by eliminating the need to repeatedly type out these requests. Setting Default Notes can be achieved by heading to Admin > EPOS > Special Requests.
Saved Carts Enabled
With Saved Carts enabled, the basket is automatically saved when a Profile is manually logged out. This means that when the Profile logs back in on the same device, their cart will be available for them to continue serving their customer.

Disabling this option means that Profiles will be required to re-add their basket contents when logging back in.
Please note: You must enable PIN Protection and Prompt Login to use this. Both of these settings can be found under Settings (or Admin on iOS) > Team. For more information, please refer to our Team Settings article.
Enable Table Service
Enabling Table Service allows you to efficiently monitor tables and their respective orders at your venue. They can help you keep track of who has placed orders, who is awaiting their orders, who has yet to settle their bill, and more.
For more information on Table Service, including how to set up your Tables and Locations, please consult our Mobile Ordering settings guide here.
Enable Tipping on this Device
Here you can choose whether or not to activate tipping for this device. When this setting is turned on, customers will be asked if they want to include a tip with their order via the card reader, prior to inserting or tapping their payment method.
You can find out more about tipping, including how to set percentage tipping and smart tipping, by checking out our article on Checkout Settings here.
Service Charge - Customer Choice
With this setting enabled, the customer can choose whether to agree to a discretionary Service Charge.
When the customer is ready to settle their bill, the iOS device will display two options to show to the customer. These buttons offer the choice to either include the suggested service charge or opt for no service charge. Once they tap their preferred option, the card transaction will commence.

For more information on setting Service Charges and choosing whether they are Mandatory, Discretionary or Disabled, please see our article on EPOS Settings here.
Ignore Auto Apply Service Charge
If you have “Auto Apply Service Charge” enabled in your EPOS Settings, applying this setting will ignore the function on this device specifically. This can be handy if the device in question is being used as a bar till within a restaurant, where you may not wish to apply a service charge for drink orders.
Change Calculator Enabled
This setting will determine whether you have a Change Calculator enabled when taking cash payments from customers. Having this enabled saves you from having to do any mental arithmetic during busy periods!
Please note: If you do not have Cash Payments enabled for your account (Admin > EPOS > EPOS Settings > Cash Payments), the change calculator will not work.

Disable Cash on This Device
This function does exactly as it says! When enabled, cash will be disabled on this device, meaning that the only accepted tenders will be card payments, gift vouchers or tabs.
Open Cash Register
Providing you have a cash register connected to your local printer, tapping this button will open the register. To set up your cash register for use with Dines, please navigate to Functions > Manage Local Printers on your iOS device.
Enable Multiple Head Discounts
Enabling Multiple Head Discounts will prompt a pop-up when applying a Discount on the Checkout screen, when the Discount has a Maximum Value Per Person included.
Let’s give more context on that. When creating a Discount code via Admin > Checkout > Discount, you have the option to set Usage Limits, so that you can specify certain restrictions for the discount code. For instance, if you want to provide a 5% discount but also want to make sure that each person can only get a maximum of £10 off, you can use this section to set up these limitations.

Once you've created this Discount code, and applied it to an order at Checkout, you will be asked to enter the Number of Heads (ie, the number of people) you are serving. This is to ensure that the correct discount amount is applied accurately.

When you tap “Apply,” the correct Discount will be applied to the order.
Sessions Split Payment Shortcut
With this function activated, this device will automatically "Split" the bill, based on the number of Covers selected in Tables / Sessions. For example, if a bill is £20 and there are two customers, the system will automatically prompt an option for “Charge £10 (Split 2 Ways).” Your card machine will then prompt payment for two separate £10 charges.
Another example can be found below.

To enable this feature, please ensure that "Session Covers" are enabled within the Admin > EPOS Settings page.
View Offline Limits
Tapping “Open” on this option will reveal a menu offering several choices for utilising Offline Mode. In this menu, you can activate or deactivate Offline Mode, and establish specific limits, such as the maximum number of transactions the device can process while disconnected from the internet.
To learn more about Offline Mode, how it works and how to enable it, you can find detailed information in our article here, or watch our video here.
Exporting/Importing Custom Settings to Other Devices
Now that you’ve set one device up to your liking, Exporting/Importing Custom Settings can save you a lot of time if you have other devices to set up.
Instead of manually enabling/disabling every function on multiple devices, Dines has the capability for exporting and importing your settings from device to device. Firstly, make sure the settings above are exactly as you want them, and then see below for a guide on exactly how to do this!
Exporting Custom Settings

Once you have customised every setting to your preference, the hard part is over. Now all you need to do is head to Functions > Default Device Settings > Export Device Settings, and you will be greeted with a QR code.
This QR code can be easily scanned by another iOS device using the Dines app, as described in the next section. Alternatively, you have the option to share this QR code through various methods, such as AirDrop, email, or saving it to your device for future use.
Importing Custom Settings
To import Dines Custom Settings from one device to another, you will first need to complete the steps above for Exporting Custom Settings.
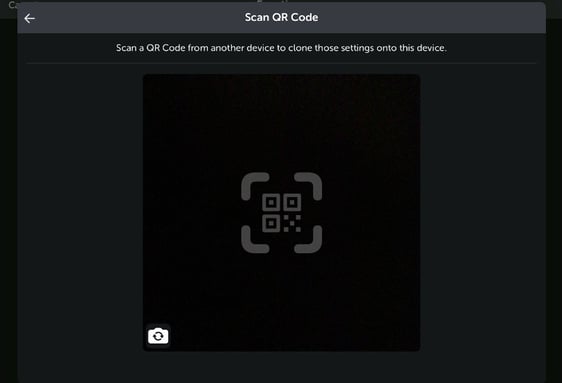
Once this is done, open the Dines app on your iOS device, and navigate to Functions > Default Device Settings > Scan QR Code.
This will open your device's camera. You can use this camera to scan the QR Code given by the “Export” option, which will then automatically load the settings onto your device. It’s as easy as that!
Thank you for taking the time to read through our Advanced Settings guide! If you have any questions or feedback, please don't hesitate to reach out to us at care@dines.co.uk, use our Live Chat, or message us via WhatsApp on 07822 002783. We're keen to hear from you and assist in any way we can.